Four questions to ask of a photograph

Photography critiques are tricky. They need to be objective whilst incorporating the artist’s intention.

The worst critiques I’ve observed focus on these common themes:

  • they look at the camera settings as part of the analysis

  • fixation on irrelevant details

  • talk about their own work more than the images being reviewed

  • comparisons to standard, even cliché, images and lazy advice to go look at popular photo-sharing websites

I like watching/reading critiques of other people’s work, but just like with books, the best critiques are not necessarily photography ones. When browsing YouTube, I often like to watch critiques on paintings because without a camera, the focus naturally shifts to more useful aspects like composition, tone and emotion. Without a camera. Turns out that the camera is the least interesting tool of the photographer.

And I’ve also noticed the best reviews are from consumers rather than producers of images. It is the art directors and gallery owners (who’s living depends on selecting good pictures) who’s opinion counts much more than a photographer with questionable credentials.


Ballerina portrait in Houston Texas

So here I want to lay out my approach to judging photographs for consistency. A rubric for a useful photography critique. I will be updating it over time as more life is lived.

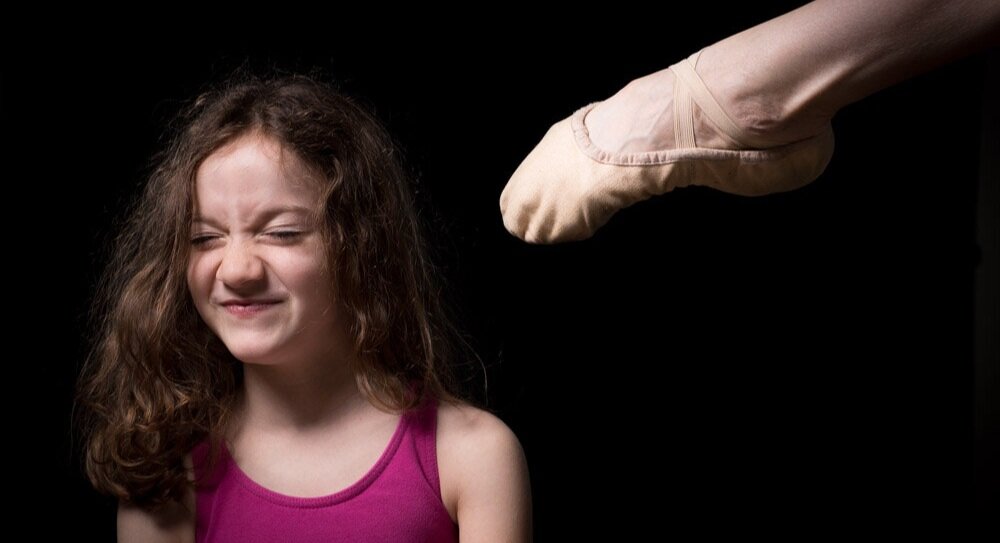
The main things to establish are “what is the Subject?” balanced with “what are the Distractions?”. These alone can make or break an image, but its also useful to consider composition and style.

Remember there are exceptions for every rule. Anyone can identify an exception, but few can use them to their advantage.

1. The Subject

The Subject could be a person or object, but it also includes the actions of the person or object, the metaphors, symbolism or message. How is the subject intentionally established and identified?

  • interest, mystery or other reason for the image to exist

  • symbolism and metaphor, emotion, nostalgia

  • brightness / contrast / size / placement / color / texture

  • selective focus

  • effects (lighting, motion, emotion, gesture)

2. Distractions

Distractions are the curse of photography. Unlike the blank canvas of the artist, photographers have the noise of the world, and have to quiet it down to only what is desired for the image. Post-processing is where a lot of tidying can be done, but the intentional photographer does as much as possible before the shutter button is pressed. Are there any unintentional distractions?

  • secondary/background elements more prominent than the subject

  • ugly / untidy objects

  • elements crossing the frame boundary

  • text

3. Composition

Composition is the arrangement of objects in the frame.

  • shapes which provoke certain emotions (think angles vs curves).

  • size relationships

  • repeating patterns

  • framing

  • implied motion

  • color and color relationships

4. Style

Style is the wrapper of an image, and often the glue for a set of images or an entire portfolio. Its the fingerprint of the artist. It is a configuration of how the subject, distractions and composition are dealt with. The style of an image may act as, or be, the subject itself, or can glue together images as part of a series. Style is a fingerprint, a calling card for the artist.


I am not particularly interested (or qualified) in critiquing other poeple’s work, yet a clear idea of how a picture can be judged will be useful as I take my own photographs. Over time, I’ll be able to look over my photographic archive with evolving eyes.

Please comment below if you have more ideas on how to judge a photograph, or if you’ve had an experience being critiqued. I’d love to know more.


For a scientific viewpoint, please read my blog post on “why do we like some images more than others?

Workflow for setting up a small business (photography)

With many requests for film developing, scanning, printing and portrait services, I decided to set up an LLC in 2021 to create a separation between my personal and business activity. These are activities I do in my spare time.

I’ll go through the steps I took to set up the business in Texas for information/entertainment purposes only. This information is not advice of any sort; for that you’ll need to consult with lawyers and accountants who are familiar with your situation.

chess set still life Filippo Nenna Houston
  1. Preparation

  • If you are going into business, then you already have a service or product you think will be desirable. For a photographer, that means you’ve already figured out your niche over the past few years and have a defendable portfolio of representative images.

  • If you have a good portfolio, that means you already have the equipment you need to make the images. So there’s no need to buy any more gear. Please note that many YouTube videos and blogs with “10 steps to start a photography business!!!!” will talk about buying gear. Don’t. I recommend using what you have because gear will eat your profits in the early years. With a low budget, you’ll discover used gear and making what you have last. With higher income, you’ll buy specialized equipment that will last because you’ll have a focused niche.

  • Using your experience with hobby/second shooter/free sessions, you also have established workflows such as session prep, execution, post-production and delivery. You have already been refining your contracts such as model releases when needed.

  • Your portfolio is likely already public on social media, and perhaps on a website that’s existed for a while to gather SEO momentum. Its pretty easy to find an unused business name in your state, but much harder to find a web domain with the same name that is available. And you’ll need both. Buy a .com domain before registering with the state so you don’t have to change names after the fact.

  • Part of the enjoyment of starting a business is the fantasy of where you will be in five or ten years from now. Write down these long term goals and store it in a folder on your computer called “business planning”. This is important because you work backwards from those dreams to make practical decisions now on how to get there.

  • The next document you need to create is a simple expenses spreadsheet. Write down every expense you predict for your first year in business from the cost of your website and accounting software, to business cards and pens. This list needs to be exhaustive. Also make a theoretical sales spreadsheet for the next year, and maybe the next few years. How many sales do you need to equal your expenses (break even)? How much to cover replacement gear? How much before you can pay yourself from the business? How will the business grow? This activity will make you think about what expenses you really need versus the nice to haves.

  • The grand finale in your preparation is to write your Business Plan to figure out if those dreams are reasonable. There are plenty of templates and more information on the web. In general you’ll have sections on: Business Overview, Management and Operations Plan, Products and Services, Competition and Marketing, and Strategic and Financial Plan.

  • Determine your business entity - this will require some thought and a lot of Googling for phrases like “LLC vs sole proprietor”. Even within an LLC there are different ways to elect to be taxed (e.g. disregarded entity or as a C- or S-corp). Make sure you are picking the right one. Setting up the business can be done DIY, but it might be safer to have a professional prep and submit the documents for you.

  • Regardless of what type of entity you’ll be starting (even if you are a single-member entity), write an Operating Agreement. Plenty of info and templates can be found searching online.

  • Get familiar with www.irs.gov. Lots of useful info there.

  • Learn about Sales Tax requirements for your state (see here for Texas), for your products and services. Also figure out if you’ll need to pay sales tax in other states (Google “Sales Tax Nexus”). More information on photography-specific sales tax info from the Texas Comptroller can be found in form 94-176.

2. Business Formation

  • Register your business with the Secretary of State (SoS). I did this in Texas, online with form 205 (their website is designed poorly, but you don’t need to interact with it that often).

  • Once the SoS paperwork comes through, register for your company’s free EIN (business version of the social security number) on the IRS website.

  • Once you have an EIN, you can set up a business bank account at a convenient bank. This is critical to keep all your business and personal expenses separate. Mixing personal and business accounts makes bookkeeping difficult and could have negative legal consequences.

  • Register with the state comptroller for Sales Tax (see here for Texas). You’ll need to look up a NAICS code which best describes which industry your business belongs to.

  • Note in your calendar when quarterly estimated taxes are due, and what dates Sales Taxes need to be payed.

3. First steps for a smooth business start

I think the order of these activities is not critical, but will help keep things simple.

  • Set up a new email account, preferably You@YourWebDomain.com. This is usually best practice for looking professional to clients, but it has a practical advantage in that you can create new online account log-ins for your business, separate from your personal ones, e.g. a separate Amazon or PayPal account.

  • Update your contracts, releases and marketing material to use your business name and new email address. Create new contracts for any services you offer. Update your website with a Terms of Use and a Privacy Policy. Guidance and templates can be found on the web, or through your lawyer.

  • Use your new email to set up separate accounts for payment processing. Examples include PayPal or QuickBooks Payments for online invoicing and point-of-sale payments. Square is a point-of-sale payment service, and Stripe integrates with SquareSpace for sales through SquareSpace websites. See my blog post comparing payment processing fees for a more in-depth look at this.

  • You can use a spreadsheet for your bookkeeping, but accounting software like QuickBooks makes data entry easier, and can generate reports that will guide business decisions and will be easier to share with an accountant at year-end. If you set this up before taking your first payment, then you can start slow and learn how to handle different payment types as they occur.

  • Next steps are to figure out the most efficient way to handle the needs of the business. Insurance will be a consideration. If your income allows, you might want to use nice-to-have software tools for client/project management, scheduling, online commerce etc.


Setting up a small business has lots of moving parts, but you can learn about them piece by piece. And don’t shy away from getting professional help - it might be more cost effective in the long run.

A simple way to cut a mat for a frame (and how to bottom-weight the mat)

Cutting a custom mat for your photographs or artwork is simple and requires only a few specialized tools. I recommend a good mat cutter such as a Logan 2000,  and a compatible straight edge which can be used as a guide for the mat cutter (see recommendations at the bottom of this post). Last, you need some scrap mat board for support underneath the mat you wish to cut, and a healing cutting mat to protect your table surface. 

Before you begin to cut your mat, you need to figure out the size of the window that will hold the print.  I like to have the window a quarter of an inch smaller than the paper sides along each side. So with an 8 by 10 piece of paper I would cut a window 7 1/2 by 9 1/2 inches to leave a quarter of an inch overlap so the print does not fall through the window. Sometimes I like to print my image smaller than the window so there is a quarter of an inch gap between the image and the mat (in which case I would print the image 7 by 9 in). 

Work on the back of the mat. 

1. Starting at the top left of your mat you can mark out the window width across the top of the mat. The remaining width represents both the left and right borders. So to figure out only the right border, divide this remainder by two and draw a vertical line with your pencil at that position. 

2. We can do the same for the bottom border by marking the window height from the top left and then dividing the remaining highlight by two. Draw a horizontal line at this point.

3. Now that the right and bottom boarders are marked, we can use the intersection of a lines as of the bottom-right origin from which we can mark out the window height and the window width. Mark out the final lines for left and top borders.

4. The window is now ready to be cut out with the mat cutter. The image is perfectly centered in the mat.

The problem is that a centrally placed image looks poorly balanced to the viewer. This is an optical illusion. It looks more balanced if the image is placed a little higher than center. When an image has a thicker bottom border than at the top, we call it a” bottom weighted” mat. 

5. A simple way to increase the bottom of border in proportion to the size of the image and the size of the mat is to draw a line from the window height mark on the left hand of the mat  to the original bottom border line intersects the right hand of the mat.  

6. The bottom-right origin point for the window is now where this diagonal line intersects the vertical line. 

7. The bottom weighted mat is more visually satisfying and looks distinctly better than any mats you’d find in a commercial frame.

This construction technique is useful for the first mat you cut for a given mat and window size. You now have the border measurements for any subsequent identical mats you need to cut. 


How real can a photograph be?


“BUT long before this stage of conscious manipulation has been begun, faking has already set in….In fact, every photograph is a fake from start to finish.”

Eduard Steichen, Camera Work 1, 1903


Since the invention chemical photography in 1839, the photograph is regarded by many as an objective representation of the world. To the uninitiated, a photograph only becomes “fake” if a shape within a composition has been distorted, or an element has been added or removed. “Photoshopped” we often call it. However, as we are about to discover, manipulations can be even more subtle, and begin even before the shutter button is pressed.

Subject, location, lighting, wardrobe, composition. All controlled. When the shutter was released, this was all reality.

Subject, location, lighting, wardrobe, composition. All controlled. When the shutter was released, this was all reality.

Subject selection

As people, we are only in one place at one time. Cameras, they only point at what a person is looking at. Forget about the cropping of an existing image, we crop the world around us as we raise a camera to our eyes. The subject of every image is a result of our personal interests, the stimulation of our senses, and some ratio of self-satisfaction vs. public acceptance. By choosing a subject, we’ve made a decision to exclude infinite alternatives. Decisions are made about how to use light, how to alter the environment on a scale from candid photography to fully a controlled studio shoot.

Images are not reality - they are merely our reality.

Film or digital Capture

Your reality is now captured on some sort of light-sensitive media; light has burned into the film, or is converted into a number via a pixel. A blue sky hue is now represented by the hue of a chemical or a RGB value that has been designed by an engineer to either closely reproduce the hue, or shift the hue slightly giving the media a characteristic “look”. The same can be said for contrast, saturation and luminance.

The important point here is that the image is the result of an engineer’s work, and they’ve never seen the images. If you’ve ever caught yourself using the phrase “straight from camera”, then we can translate that to “I let a skilled chemical/software engineer process my image for me”. Nothing inherently wrong with that (for example people love the “Portra” look), but it is an intentional decision never the less.

Altering a photograph to your own preference is no different to accepting the results straight from the camera. And its interesting to note that a film negative scan by definition is a digital image. There’s now two adjustments (an analog and a digital) forced on the image, from people you’ve never met.

Editing (culling)

“Editing” in a literal sense is the selection of images from a master set. Another type of cropping, this time of the number of images we show.

We might have taken portraits of a happy person, but we only show the one picture where they look sad. An image of a stormy landscape is interesting precisely because it doesn’t happen very often, and the sunny day versions of the scene are less likely to be published. Editing is deciding on the narrative we wish to portray. Reality through selection. Reality affected by critique.

The best photographers only show images that they believe represent their best contributions. If they showed you all their images it would water down your opinion of them, their message and their legacy. We all do this to some degree with personal pictures on social media.

Global processing

We can do many things to a whole image at once. Correcting exposure. Smoothing. Sharpening. Contrast. Colour correction. Perspective corrections. Cropping. All these things begin with the film/camera engineer’s interpretation of your image, and likely further modified by the image-taker. In previous eras, photographers considered the darkroom interpretation of an image as important as the decisions made at the time of capture. A decision not to work on an image is still a decision.

Printing further affects an image in the way the paper is toned or textured, and they way it can affect shadows and colours. Even displaying a digital image on a screen affects its “look” - the whites on your computer screen are almost certainly warmer or cooler than those on mine.

Architectural photographers often correct converging vertical lines cased by the perspective of looking up at tall buildings. Making the sides of buildings parallel in this manner makes it look more like a schematic. But the reality of perspective is gone. The reality of geometry has been chosen instead.

Reverse perspective shows an object from multiple viewer positions, as if we were were walking past it. Note how the vanishing point is towards the viewer! This is the reality of movement, but has to be composited from multiple images.

Reverse perspective shows an object from multiple viewer positions, as if we were were walking past it. Note how the vanishing point is towards the viewer! This is the reality of movement, but has to be composited from multiple images.

Local processing

“Photoshopping” is a phrase used to describe an altered photograph, though it is not just a digital phenomenon - it has been happening since photography was invented. This sort of manipulation is in the realm of the graphic design, but still a tool of the average photographer.

When corrections are applied to only a portion of an image, we are into true “Photoshop” territory. These can be local versions of the ”global” corrections, but often include warping, skin smoothing, compositing (see the example image above), and spot removal. 

There is nothing new under the sun, and all the techniques listed above were available to the darkroom photographer too. Looking through a Bill Brandt book, I saw halos of light around buildings and very dark areas in places that you would expect to be lit given the conditions. I think he totally “photoshopped” his work. But his desire was to give a feeling, an emotion, that a flat untouched image would fail to provide.

This exceptional TedX talk by Scott Kelby (who is quite wise and inspiring unless interacting with his co-hosts) really hits on an important point; a picture is only visual and only one instant in time. It omits important elements of a moment like conversation, personality, smells, the work leading to the image. All we have is a picture and the viewer is able to focus on distractions that we would never have noticed in reality. Removing these distractions can bring the image closer to they way the photographer originally perceived it. I think it’s not only a question of “how far is too far?”, but how far is appropriate? How far tells the story?

Lets face it, we already went pretty far when we put the camera in our hands.

Images are not reality - they are merely our reality.


Paterson vs Jobo for developing film

You are looking to develop your own negatives, and you know there’s a bunch of equipment you need to get started (here’s my quick overview of the process). Some measuring jugs, a thermometer, a dark-bag, chemicals and, of course, some developing tanks.

The two main brands are Paterson from England, and Jobo from Germany. Both are great. Here’s a guide for picking your first tank.

Paterson Tanks

Paterson Film Developing Tank

Paterson tanks are inversion only. This means you use enough chemicals to completely submerge the film and you rotate the tank in your hands once a minute (or as directed). This “agitation” keeps fresh chemical in contact with the film.

The entry cost of the tanks and reels is lower than Jobo, and the reels are simple enough to load with practice. Many tank sizes are available and all use interchangeable components like the reels, funnels and caps. There is also the mod-54 which can be used in the Multi-reel-3 tank to process six sheets of 4x5 film.

I have a method where I develop two Multi-reel-3 tanks at a time, offsetting the second tank by thirty seconds which gives time to pour in developer and agitate the first tank before immediately starting on the second. This develops four medium format or six 35mm rolls in about thirty minutes.

Jobo Tanks

Jobo primarily uses continuous rotation for the agitation of the chemicals. The tanks spin about their long axis, dipping the film through chemicals that cover the bottom half of the reels. Many people avoid Jobo tanks for two reasons, both of which I’ll myth-bust here.

  1. Jobo tanks are often seen attached to large and expensive rotation machines. These are useful for the temperature control of c-41 and e-6 color developing, but for occasional development of black and white film it can be over-kill. You can manually rotate the tanks on a Jobo roller-base, or make your own base by screwing some caster wheels onto a piece of plywood. Bonus: a home-made base means you can use Jobo tank extension combinations that some of Jobo’s motor-bases can’t cope with. You can also use the regular inversion method like with Paterson tanks, but this uses significantly more chemicals. Just make or buy a roller base.

    Jobo doesn’t make a compact motor-base without the water bath. Jobo, please make a compact motor-base without the water bath! I made a gizmo that fits Jobo tanks on a vintage Uniroller motor-base, but I can’t image many people having the motivation to make this themselves.

  2. Jobo tanks and reels are more expensive than Paterson. But Jobo tanks use a fraction of the chemicals so the costs even out quickly and there is much less chemical waste.

Jobo has some interesting positive aspects that I didn’t know about until I bought one.

  • The reels have a red tab that allow two rolls of 120 medium format film to be loaded on one reel (so twice the film, with half the chemicals!). Still only one 35mm roll per reel.

  • There are different base-tank sizes, but the real benefit comes from extension modules that you fit between your base and the lid. This means you can easily create the best-sized tank for the number of rolls you are developing in a batch.

  • Most people getting into developing will be well served by the 1500 system. Jobo also make a larger diameter 2500 system which uses the same inner-cores, but wider reels and the ability to use 4x5 reels.

  • The 2500 system can be used for developing darkroom prints. They have a 2800 system specifically for prints which is almost identical to the 2500 except it uses a light-trap cup rather than the inner-core used for film reels. All 2500 and 2800 parts are interchangeable.

  • The system gets more convenient when you have the money and the space for a motor processor machine.

There is one major negative though. Continuous agitation on a manual roller base requires your attention on one tank for the entire time. If you are doing multiple film stocks with different developing times, they need to be done one after the other, rather than at the same time like I described above with two Paterson tanks. For three or four rolls, Paterson developing is quicker in this regard.

Tank stats: Haw many rolls and how much chemical?

With Paterson or Jobo, avoid the smallest tanks that only do one roll of 35mm film. The next size up will do two 35mm rolls or at least one 120 medium format roll. This is significantly more useful because you can still do a single 35mm roll in them if you have to.

  • Paterson universal tank with two reels, $34. Can do two 35mm or one 120 roll. 580ml or 500ml respectively of chemicals using inversion.

  • Jobo 1520 with one reel, $68 (extra reel, $27). Can do two 35mm or two 120 rolls. 240ml of chemicals using rotation (or 485ml for inversion).

Assuming you have this kit and you want to do more film in a single batch, you’ll need a separate Paterson tank or an Jobo extension module.

Lets go crazy and develop more rolls.

  • Paterson Multi-reel 5, $45 (two more reels, $24). Can do five 35mm or three 120 rolls. 1500ml of chemical using inversion.

  • Another Jobo module 1530, $45 (another two reels, $54). Can do eight 35mm or ten 120 rolls. 900 ml chemical using rotation.

This Jobo 1520+1530+1530 is a monster that could burn out the smaller Jobo machines. On a manual base its fine. But think about it: ten medium format rolls in the same time, and using less developer volume than two rolls in a Paterson tank! Make sure 900ml of your developer can cope with ten rolls without exhausting itself. Ilfosol-3 and HC-110 dilution B seem to be fine with it.

Example Costs

It is clear that Paterson is cheaper to get you up and running, and that Jobo can save a massive amount of time and chemicals. A rough cost estimate for black and white chemicals are $3.50 for 1000ml of developer (one-shot), stop (reused for 20 rolls) and fixer (reused for 10 rolls).

Two rolls of 35 film:

  • Paterson Universal = $34, chemicals = $1.85

  • Jobo 1520 + reel = $95, chemicals = $0.90

Two rolls of 120 film:

  • Paterson Multitank-3 + reels = $62, chemicals = $1.75

  • Jobo 1520 = $68, chemicals = $0.90

Four rolls of 120 film:

  • Paterson Multitank-3 x2 + reels = $124, chemicals = $7

  • Jobo 1520+1530 + reels (four rolls in a six-roll tank) = $140, chemicals = $2

In only a few batches, the cost Jobo saves from chemicals covers the difference in equipment cost.

Bottom line

I used Paterson tanks for years developing hundreds of rolls and would recommend them in a heartbeat to anyone getting started, knowing they will only occasionally develop one or two rolls. Also, the mod-54 is a great and cost effective way to develop large format 4x5 sheets.

If you see yourself developing more rolls, or more often, then the Jobo tanks are a better long-term investment.